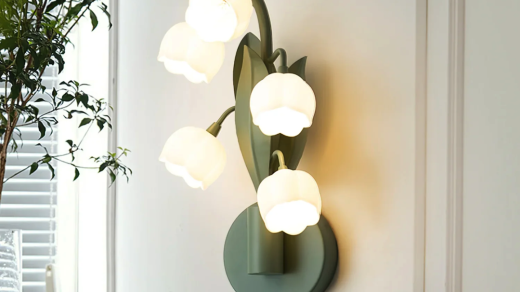
Got an issue with glare from your downlights? It’s a common complaint, but thankfully, there are plenty of effective ways to tackle it during installation to achieve truly perfect lighting. It’s not just about choosing the right downlight; it’s also about how and where you put it. Let’s dig into some practical tips to get you sorted.
Understanding Glare and Its Impact
Before we dive into solutions, it’s helpful to understand what glare actually is and why it bothers us. Simply put, glare is an uncomfortable visual sensation caused by excessive brightness or contrast in your field of vision. It can range from merely annoying to genuinely debilitating, especially for those with sensitive eyes or certain vision conditions.
Types of Glare You Might Encounter
Not all glare is created equal. We generally categorize it into a few types, and understanding them helps in selecting the right mitigation strategy.
Discomfort Glare
This is the most common type you’ll experience with downlights. It doesn’t necessarily impair your vision, but it causes discomfort, eyestrain, and can make a space feel less inviting. Think of a bright spot in your peripheral vision that just won’t go away.
Disability Glare
More serious than discomfort glare, disability glare actually impairs vision, making it harder to see details or distinguish objects. This is often an issue in task-oriented areas where precision is important. While less common with well-designed downlights, poor installation can certainly lead to it.
Reflected Glare
This happens when light bounces off a glossy surface, like a polished floor, a TV screen, or a highly reflective countertop. The reflection itself becomes a source of glare, and it can be particularly troublesome as it often shifts with your movement.
Why Glare Matters for Your Space
Beyond the immediate discomfort, glare has several negative impacts. It can reduce productivity in work areas, make relaxation difficult in living spaces, and even pose safety risks in areas like kitchens or stairwells. Good lighting, free from glare, enhances the functionality and aesthetics of any room. It’s about creating a comfortable, usable, and visually appealing environment.
Choosing the Right Anti-Glare Downlight Fixtures
The journey to glare-free lighting often starts with selecting the right downlight fixture itself. Manufacturers are increasingly aware of glare issues and design products specifically to mitigate them.
Deep Recessed vs. Shallow Downlights
One of the most effective ways to reduce direct glare is by choosing deeply recessed downlights. The deeper the LED source is set within the fixture, the more the housing itself acts as a shield, preventing direct light from hitting your eyes.
The Benefits of Deep Recess
Deeply recessed fixtures create a “cut-off angle” where the light source is no longer visible from typical viewing angles. This essentially hides the bright spot, directing the light downwards where it’s needed without scattering it into your line of sight. It’s a simple yet powerful design principle that makes a huge difference.
Considerations for Shallow Downlights
While sometimes necessary for ceiling depth constraints, shallow downlights inherently have a higher risk of glare. If you must use them, look for other anti-glare features like frosted diffusers or specialized optics, which we’ll discuss next.
Anti-Glare Optics and Diffusers
Beyond recess depth, the internal design of the downlight plays a crucial role.
Honeycomb Grids and Louvers
These are fantastic for precise light control. Honeycomb grids, often made of plastic or metal, fit into the downlight and break up the light beam into many smaller, less intense beams. This significantly reduces the perceived brightness from any single point. Louvers work similarly, directing light in a more controlled fashion.
Frosted or Opal Diffusers
A diffuser’s job is to spread light evenly, softening the light source. Frosted or opal diffusers achieve this by scattering the light as it passes through, reducing the intensity of the light source and making it less harsh on the eyes. The trade-off can be a slight reduction in overall light output, but the comfort improvement is usually worth it.
Black Baffles and Reflectors
Many anti-glare downlights feature black baffles or reflectors around the light source. Black surfaces absorb light rather than reflecting it, which helps to minimize stray light and absorb any reflections that might contribute to glare. This creates a very crisp, controlled beam of light.
Beam Angle Considerations
The beam angle of a downlight describes how wide the spread of light is. It impacts both the coverage of your lighting and the potential for glare.
Narrow vs. Wide Beam Angles
Narrow beam angles (e.g., 20-30 degrees) create a focused spot of light, often used for accent lighting or task lighting over specific areas. While they can be very effective, if pointed incorrectly, the intense spot can be a source of glare. Wide beam angles (e.g., 60+ degrees) spread light more broadly, reducing individual hot spots but potentially contributing to overall brightness if too many are used in a small space.
Matching Beam Angle to Function
For general ambient lighting, a medium to wide beam angle is often preferable as it provides more even illumination and reduces the need for as many fixtures. For task lighting, a narrower beam can be effective, but precise positioning is critical to avoid glare for the person performing the task. It’s all about balancing spread with intensity.
Strategic Placement and Spacing for Glare Reduction
Once you’ve picked out the right fixtures, how and where you install them is the next big piece of the puzzle. Even the best anti-glare downlight can cause problems if it’s in the wrong spot.
Avoiding Direct Line of Sight
This is perhaps the most fundamental principle. The goal is to position downlights so that the bright light source is not directly visible from typical viewing angles in the room.
Consider Seating and Standing Positions
Think about where people will naturally sit, stand, and move in the room. For living rooms, consider the couch and armchair positions. In kitchens, think about where you stand at the counter. For bedrooms, consider lying in bed. Ideally, when you look up from these positions, you shouldn’t be looking directly into the downlight.
Wall Washing for Softer Illumination
Instead of pointing downlights directly into the room, consider using them as “wall washers.” This involves placing downlights closer to the walls and angling them slightly to illuminate the vertical surfaces. This creates a softer, more ambient light through reflection, and the light source itself is less likely to be in your direct line of sight. It’s a great technique for corridors or living rooms.
Optimal Spacing Between Fixtures
The number of downlights and their spacing directly impact the overall brightness and evenness of your lighting, which in turn influences glare.
Preventing “Hot Spots” and Shadows
Too many downlights packed together can create overly bright “hot spots,” increasing the likelihood of discomfort glare. Conversely, too few, or poorly spaced, can lead to uneven lighting with harsh shadows, forcing your eyes to work harder in contrast, which can also contribute to discomfort. The aim is to achieve uniform, comfortable illumination across the space.
General Spacing Guidelines
While specific calculations can get complex, a good rule of thumb for general ambient lighting is to space downlights roughly 1 to 1.5 times the ceiling height apart. For example, in a room with an 8-foot ceiling, spacing them 8 to 12 feet apart might be a good starting point. However, this varies wildly based on lumen output, beam angle, and room function, so it’s more of a starting point than a hard rule. For task lighting, they’ll need to be closer together and specifically aimed.
Dimming and Light Control
Even the best-installed downlights benefit from flexible control. Dimming is your best friend in managing glare.
The Power of Dimmers
A high-quality dimmer allows you to adjust the light output to suit the mood, task, or time of day. Sometimes, glare isn’t about the fixture itself, but simply that the light is too bright for the current conditions. Being able to dial down the intensity can instantly eliminate discomfort. Ensure your downlights are “dimmable” and use a compatible dimmer switch (e.g., leading-edge, trailing-edge, 0-10V, DALI, etc., depending on the driver).
Zoned Lighting for Adaptability
Consider dividing your downlights into different zones, controlled by separate switches or dimmers. For instance, in an open-plan living area, you might have one zone for general ambient lighting, another for task lighting over a kitchen island, and a third for accent lighting over artwork. This allows you to illuminate only the areas you need, at the intensity required, further reducing unnecessary brightness and potential glare in other parts of the room.
Practical Installation Techniques
Beyond placement, there are several hands-on techniques you can employ during the actual installation process to ensure your downlights perform as intended without glare.
Ensuring Proper Trim and Bezel Selection
The trim (or bezel) is the visible part of the downlight that sits flush with the ceiling. Its design can impact glare significantly.
Matte Finishes Over Glossy
Always opt for trims with a matte or satin finish over glossy ones. Glossy trims can reflect light, creating a secondary source of glare around the fixture itself. Matte finishes absorb light, helping the fixture blend more seamlessly with the ceiling and avoiding unwanted reflections.
Adjustable Gimbal Trims
For accent lighting or areas where light needs to be directed precisely (e.g., artwork, shelving), adjustable gimbal trims are invaluable. These allow you to pivot the light source within the fixture. This means you can direct the light exactly where it’s needed while ensuring the light source itself remains hidden from common viewing angles, further reducing glare. They’re especially useful for wall washing.
Managing Ceiling Reflection and Color
The ceiling surface itself plays a role in how light is perceived and whether glare becomes an issue.
The Role of Ceiling Color
Darker ceilings absorb more light, making a room feel cozier but potentially requiring more powerful light sources. Lighter ceilings, especially white or off-white, reflect light, helping to bounce it around the room and contribute to overall ambient illumination. However, an overly bright white ceiling in conjunction with powerful downlights can create a very high-contrast environment, sometimes contributing to discomfort glare if the light sources themselves aren’t well-shielded. A balance is key.
Recessed Housing Integrity
When installing the downlight housing, ensure it’s properly seated and sealed within the ceiling. Any gaps or imperfections around the trim can allow light to escape upwards or create uneven light spill, which can subtly contribute to perceived glare or just an untidy finish. A snug, flush fit is both aesthetically pleasing and functionally beneficial.
Protecting Your Eyes During Installation
This might seem obvious, but it’s worth mentioning. When you’re up on a ladder, looking directly into potential downlight positions, it’s easy to expose your eyes to the unshielded light source during testing.
Temporary Glare Shields for Testing
Before finalizing positions and commissioning all downlights, if you need to test them, consider using temporary glare shields or even just a piece of cardboard to block direct light from your eyes while you’re directly underneath the fixture. This helps protect your vision and gives you a more accurate sense of how the light will behave when viewed from typical room angles, rather than directly below.
Advanced Considerations and Long-Term Maintenance
Achieving perfect lighting isn’t just about the initial setup; it also involves understanding how light interacts with your environment and maintaining your system over time.
Color Temperature (CCT) and Glare Perception
The color temperature of your downlights (measured in Kelvin, K) can subtly influence how glare is perceived, even if it doesn’t directly cause it.
Warmer vs. Cooler Light
Warmer color temperatures (e.g., 2700K – 3000K) emit a more yellowish, inviting light often associated with incandescent bulbs. Cooler temperatures (e.g., 4000K – 5000K) are bluer and mimic daylight. While cooler light can make tasks easier by increasing alertness, some people find very cool, bright light to feel harsher or more prone to causing discomfort glare, especially in residential settings. For most homes, a warmer white (2700K-3500K) is generally more comfortable and less likely to feel glaring.
Tunable White Options
Some advanced downlights offer “tunable white” technology, allowing you to adjust the color temperature from warm to cool. This provides incredible flexibility, letting you choose the most comfortable and appropriate CCT for different times of day or activities, further helping to mitigate any perceived harshness or glare.
Understanding the Unified Glare Rating (UGR)
For more technical projects or those where glare is a critical concern (like offices or schools), you might encounter the Unified Glare Rating (UGR).
What UGR Tells You
UGR is a numerical method for quantifying discomfort glare. A lower UGR value indicates less discomfort glare. For instance, a UGR of 10 is almost imperceptible, while 28 is considered unacceptable. Most comfortable indoor lighting aims for a UGR below 19. While UGR is usually calculated by lighting designers for an entire space rather than a single fixture, understanding its principle helps you appreciate the design efforts in anti-glare downlights. Many manufacturers will provide a UGR rating for their fixtures when used in typical scenarios.
When to Consider UGR
For residential installations, focusing on the practical tips mentioned above (deep recess, baffles, good placement) is usually sufficient. However, if you’re particularly sensitive to glare, or designing a home office where extended computer use is common, asking about UGR values for potential downlights can provide an extra layer of confidence in your choices.
Regular Cleaning and Maintenance
Even the best downlights can suffer from reduced performance and increased perceived glare if not maintained.
Dust and Debris Accumulation
Over time, dust, dirt, and even tiny insects can accumulate within the downlight housing and on diffusers or lenses. This layer of grime can scatter light in unintended ways, reduce light output, and make the light source appear fuzzier or less controlled, potentially contributing to glare.
Routine Cleaning for Optimal Performance
Periodically (e.g., once or twice a year), carefully clean your downlights. For most LED downlights, this simply means gently wiping the visible trim and diffuser with a soft, dry or slightly damp cloth (after turning off the power, of course). Avoid abrasive cleaners. This simple step ensures your anti-glare features continue to work effectively and your lighting remains clear and comfortable.
By carefully considering both the fixture itself and its installation, you can effectively combat glare and enjoy truly comfortable, functional, and beautiful lighting in your space. It’s a blend of thoughtful selection and smart application that leads to that perfect illumination.